How to Enter Expenses in ERPNext made Simple

Managing expenses effectively is paramount for businesses of all sizes, and ERPNext stands out as a comprehensive solution to streamline this crucial process. In this guide, we’ll guide you through a step-by-step process to enter expenses in ERPNext, providing valuable tips to enhance accuracy and efficiency in your financial management.
Enter Expenses in ERPNext
Embarking on the journey to seamlessly record your expenses in ERPNext involves a straightforward process. By adhering to the following steps, you can efficiently input your financial outlays into the ERPNext system, ensuring that your accounting records are not only accurate but also well-organized.
The user-friendly interface of ERPNext, coupled with these step-by-step instructions, will empower you to navigate the platform with ease and confidence, contributing to a smoother and more effective financial management experience for your business.

Let’s dive into the details of each step to make the expense entry process a seamless part of your routine.
Step 1: Accessing Your ERPNext Account
Begin by logging into your ERPNext account.
If you haven’t already, make sure you have the necessary permissions to access the Accounting module.
Step 2: Navigating to Journal Entry
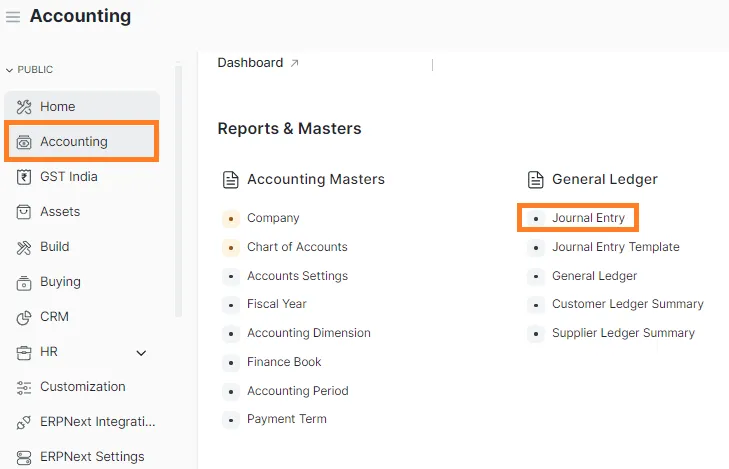
- Click on the “Accounting” module in the ERPNext dashboard.
- Under “General Ledger,” select “Journal Entry.”

Step 3: Creating a New Journal Entry
- Click on “Add Journal Entry” to initiate a new journal entry.
- Under “Entry Type,” choose “Journal Entry” from the dropdown.

Step 4: Completing the Table in Journal
In the table section, locate the “Account” column. On the:
a) Select the appropriate account to be debited (e.g., Administrative Expenses) in debit section.
b) Enter the debit amount.

Enter expenses in ERPNext using Journal Entry
c) Select the appropriate account to be credited (e.g., Cash) in credit section.
d) Enter the credit amount.
Step 5: Reference Section
Under the “Reference” section, input the reference number (invoice/bill number) and reference date for documentation purposes.

Step 6: Adding User Remarks
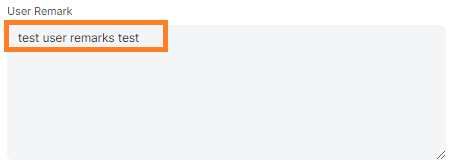
In the next section, enter any relevant user remarks or details pertaining to the expenses being recorded (if required).
Step 7: Saving the Document
Save the document by pressing Save button.
Note: Saving the document does not finalize it; instead, it puts the journal entry in draft status.
Step 8: Review and Finalize
- Review the journal entry to ensure accuracy and completeness.
- If everything is in order, click or press Submit button to finalize the journal entry.
Conclusion
Congratulations! You’ve successfully recorded your expenses in ERPNext using journal entry feature.
This streamlined process not only ensures accuracy in financial records but also provides a clear overview of your business expenditures. Regularly review and update your financial entries to maintain a well-organized and transparent financial system.
If you’re seeking expert guidance for the seamless implementation and customization of ERPNext, unlocking its full potential for your organization, look no further. Reach out to us, and our seasoned team will be thrilled to provide the assistance you need.
Feel free to drop us a message, either via email at info@turqosoft.com or by giving us a call at +91 9841205845.
Alternatively, stay connected with us on various social media platforms such as LinkedIn, YouTube, Facebook, Twitter, Pinterest, or Instagram to receive regular updates on ERPNext and other pertinent topics.
Image Credit: Canva


